Overview
The private label email feature in Finalize reinforces your company's brand identity and ensures clarity for recipients when sending outgoing emails.
Private label email allows you to send emails that appear to come from your email domain, rather than LinkSquares. The feature creates a more professional appearance and better brand recognition for communication.
Reach out to your Account Manager if you would like more information about enabling.
Getting Started
Setup of the Finalize private email begins here: Settings/Finalize/Private Label Email
Two required components:
1. Sending Domain - The domain in your email address.
Example:
- '@yourbusiness.com'
- This is typically your email domain
Note: The user email address domain and the sending domain must match for Private Label Email to function correctly.
If the domains do not match, any email sent will default to the standard email functionality.
2. Mail FROM Domain - This is a subdomain used for technical authentication and bounce handling.
As a best practice, we recommend using a subdomain specifically for emails ending to protect your sender reputation for your primary domain.
Additionally, you can segregate different third-party sending services
Note: The subdomain Must be formatted as: subdomain.domain.com
The feature will not be successful without this specific format.
Example:
- mail.yourbusiness.com, noreply.yourbusiness.com
- An existing subdomain can be used. Example: mail.yourbusiness.com or noreply.yourbusiness.com) or a new subdomain can be used specifically for this feature.
-
If creating a new subdomain, it is recommended, but not required, to set up an inbox to handle bounced emails.
Process
1.Provide domain information
- Sending Domain: example- yourbusiness.com
- Mail FROM Domain: example- mail.yourbusiness.com
2. Add DNS Records to your Domain
- Choose Generate DNS Records. This creates the required DNS settings and will automatically download. For more details about the DNS records and how they are used, reference the Technical Reference Examples at the bottom of the page.
- Update your DNS records with the DNS records for the domain.
- Required: Access to the domain's DNS settings through your domain registrar (like GoDaddy, Namecheap, etc.) or DNS provider.
3. Verification
After you've added the DNS records:
- Allow 24-48 hours for DNS changes to fully propagate across the internet
- Testing is available: Settings/Finalize/Private Label Email
- Verify DNS
- Status will indicate Pending, Success or Failure
Email Customization
- Settings -> Finalize App -> Private Label Email
- Logo file formats accepted: png and jpg
- Logos can be customised by applying the appropriate pixel dimensions.
- Messages can be formatted using simple HTML commands. For line breaks, <br> command will need to be used.
- An example of an HTML-formatted message can be found at the bottom of this article under technical reference examples
- Messages, Disclaimers, and Signature blocks can be customised using rich text formatting, including fonts, colors, text formatting, and line breaks.
- Email signature blocks can be tokenised for automatic population from the sending user’s profile.
For Example:
Using Tokens in the Email Signature Block
The signature block supports several dynamic tokens that automatically populate with information from the Finalize user’s profile configuration. These tokens allow each user’s signature to be personalized without requiring manual edits.
The formatting applied to each token is applied to the inserted text (e.g. font types, colors, bolding)
Available Tokens
You can include the following tokens in your signature block:
| Token | Description | Example Output |
| #[NAME]# | Inserts the user’s full name as configured in their profile | Jane Doe |
| #[EMAIL]# | Inserts the user’s email address | jane.doe@company.com |
| #[TITLE]# | Inserts the user's job title | Senior Legal Analyst |
| #[DEPARTMENT]# | Inserts the user’s department name | Legal Operations |
- When an email is generated by a user in Finalize, these tokens automatically populate with the information from the Finalize user’s profile.
For example, if your signature block looks like this:
Best Regards,
#[NAME]#
#[TITLE]# | #[DEPARTMENT]#
#[EMAIL]#
The sent email will populate with the following:
Best Regards,
Jane Doe
Senior Legal Analyst | Legal Operations
jane.doe@company.com
Tips
-
- Review Finalize user profiles, confirming their data is up to date. Token values are pulled directly from their profile settings.
- The Ability to mix tokens with standard text or formatting (bold, italics, line breaks) for a consistent, professional layout.
- If a profile field is blank, the corresponding token will not display a value in the signature block.
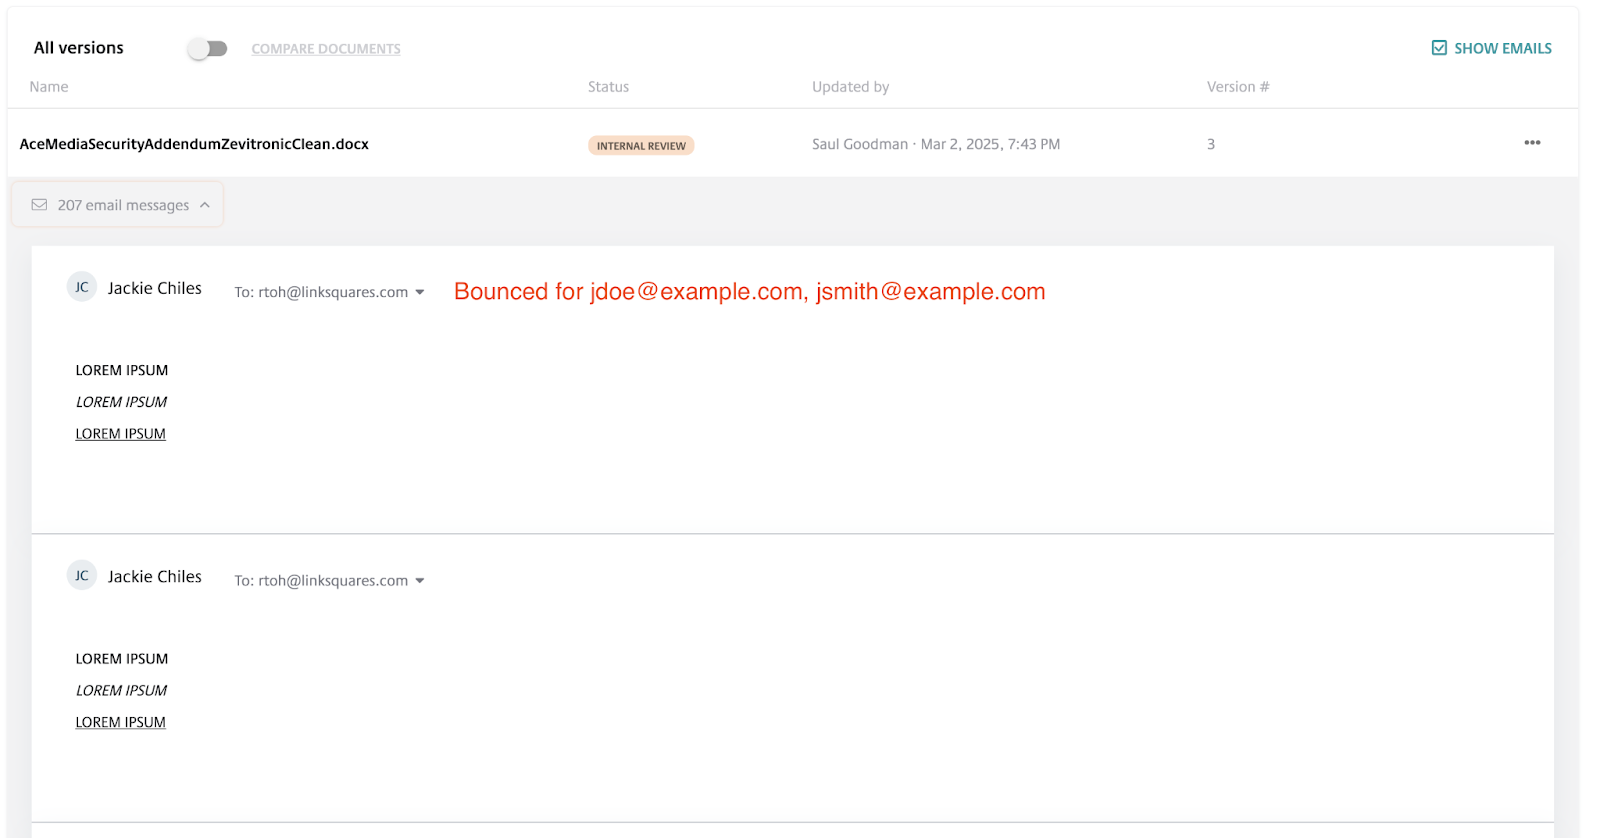
Bounce Handling
In the event of a bounced email sent using the private label email feature, a notification will appear directly within the agreement page under the email communication that was sent out.
The notification includes details identifying which email address was invalid, allowing the user to quickly review and correct the issue.
Frequently Asked Questions
-
What if I don't have access to my DNS settings?
- Contact your IT department or Email Administrator, the contact who manages your domain and DNS settings. Share this guide with them and ask for their assistance in adding these records.
-
How long do DNS changes take to fully implement?
- DNS changes typically take 24-48 hours to fully propagate throughout the internet; however, it could be faster. Expectation: 48 hours
-
Does this affect my website or existing email?
- No. The DNS records only add authentication for our service to send emails on your behalf. They do not affect your website or your existing email service.
-
What if the setup does not work?
- Verify ALL DNS records were entered correctly.
- Common issues to review:
- Typos
- Using the wrong host/name fields
- Not waiting long enough for DNS propagation (up to 48 hrs)
- If all the above have been reviewed and verified, reach out to: support@linksquares.com
-
Suggested Imaging Sizing
- Horizontal logos: 200px × 60px
- Square logos: 100px × 100px
- Vertical logos: 100px × 150px
Technical Reference Examples
Below are technical examples for reference on DNS and HTML email formatting.
Examples below are provided from the actual DNS records and will be generated specifically for your Sending Domain and mail FROM domain.
DNS Record Examples
Verification Record
Add a verification token to your DNS provider to prove that you own the domain:
Type: TXT
Host: _amazonses
Value: [Random Verification Token Provided by LinkSquares]
TTL: 3600 (or default)
SPF Record
Add this record to authorize our servers to send email on your behalf:
Type: TXT
Host: [Your MAILFROM Subdomain]
Value: v=spf1 include:spf.amazonses.com ~all
TTL: 3600 (or default)
DKIM Record
Add this record for email authentication. Values provided when DNS records are generated and downloaded in LinkSquares
There will be three (3) CNAME records provided.
Type: CNAME
Host: [provided CNAME name]
Value: [provided CNAME value]
TTL: 3600 (or default)
DMARC Record
Add this record to prevent email spoofing:
Type: TXT
Host: _dmarc
Value: v=DMARC1; p=none; rua=mailto:dmarc@yourbusiness.com
TTL: 3600 (or default)
MX Record
Add this record to specify the email server responsible for receiving email on behalf of a domain
Type: MX
Host: [Your MAILFROM Subdomain]
Value: 10 feedback-smtp.awsregion.amazonses.com
TTL: 3600 (or default)
Mail FROM Domain Configuration with AWS Route 53
The below are for Companies using AWS for domain management ONLY.
Below example for set up Mail FROM Domain in Route 53
Example:
- Decide on your Mail FROM subdomain: The subdomain dedicated to email authentication
-
Log in to the AWS Management Console
- Go to https://console.aws.amazon.com
- Navigate to Route 53 under "Services" or search for "Route 53"
-
Access your domain's Hosted Zone
- Route 53 dashboard, Hosted zones
- Select the domain: example- yourbusiness.com
-
Create SPF Record for your Mail FROM subdomain
- Create record
- Record name: Enter your subdomain prefix example: mail
- Record type: TXT
- Value: v=spf1 include:amazonses.com ~all
- TLL: Keep the default or enter 3600
- Create records
-
Create DKIM (CNAME)
- Each CNAME provided follow these steps
- Create record
- Record name: enter name provided, less your domain. Example: k1._domainkey
- Record type: CNAME
-
Value: the full value provided. Example: k1.dkim.amazonses.com
- Note: Some DNS providers may not automatically detect fully qualified domain names and will require the trailing dot.
- TLL: Keep the default or enter 3600
- Create records
- Each CNAME provided follow these steps
-
Configure MX
- Create record
- Record name: _amazonses or _amazonses.example.com if your DNS editor specifies
- Record type: TXT
- Value: Enter the full value provided for TXT record for Domain.
- Note that some DNS providers may require the value to be wrapped in quotes
- Create records
Example Records in AWS Route 53
Note: If using a different Mail FROM subdomain: Example - email instead of mail, use that name instead in the "Record Name" fields
Visual Guide to DNS Configuration
DNS Configuration Diagram